Experiments with ruby-processing (processing-2.2.1) and JRubyArt for processing-3.0

Wednesday, 30 October 2013

An opportunity to restore ruby-processing as a rubygem distributable gem?

It occurs to me that at least on ArchLinux (since processing-2.0.1) and the Mac (since processing-2.1) the location (path) of processing jars could be relied on (albeit OS specific). Further the majority of sketches can now be run with an installed jruby (which is now the default) thus we could exclude jruby-complete and the processing jars from the gem, and we would easily return to rubygems distribution. It would be sensible to retain the the jruby-complete as an optional post install to enable access to shader sketches and possibly still support application export, although that would not be a priority. The folks at processing are still inviting integration with the processing ide (see below), but I would prefer ruby-processing to stick with the ruby ecology.

Saturday, 26 October 2013

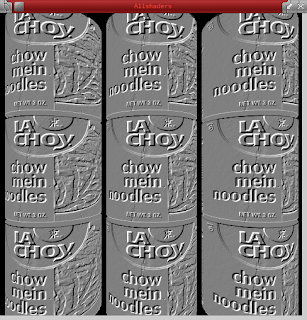
Using shaders in ruby-processing (tutorial example translated)

Anyone interested in using shaders in ruby-processing should read the vanilla processing tutorial here. All the code for the tutorial is available here, including the necessary glsl shader (and image) files used in this sketch, which is translated from one of the included examples.You might also like to read the codeanticode blog (by Andrés Colubri) to keep up to date with latest developments.
# Texture from Jason Liebig's FLICKR collection of vintage labels and wrappers:
# http://www.flickr.com/photos/jasonliebigstuff/3739263136/in/photostream/

CAN_SIZE = 60

attr_reader :label, :can, :cap, :angle, :color_shader, :light_shader, :texlight_shader
attr_reader :sel_shader, :pixlight_shader, :tex_shader, :texlightx_shader, :bw_shader
attr_reader :edges_shader, :use_texture, :use_light, :emboss_shader

def setup
  size(480, 480, P3D)
  @label = load_image("lachoy.jpg")
  @can = create_can(CAN_SIZE, 2 * CAN_SIZE, 32, label)
  @cap = create_cap(CAN_SIZE, 32)
  @angle = 0
  @color_shader = load_shader("colorfrag.glsl", "colorvert.glsl")
  @light_shader = load_shader("lightfrag.glsl", "lightvert.glsl")
  @tex_shader = load_shader("texfrag.glsl", "texvert.glsl")

  @texlight_shader = load_shader("texlightfrag.glsl", "texlightvert.glsl")
  @pixlight_shader = load_shader("pixlightfrag.glsl", "pixlightvert.glsl")
  @texlightx_shader = load_shader("pixlightxfrag.glsl", "pixlightxvert.glsl")

  @bw_shader = load_shader("bwfrag.glsl")
  @edges_shader = load_shader("edgesfrag.glsl")
  @emboss_shader = load_shader("embossfrag.glsl")

  @sel_shader = texlight_shader
  @use_light = true
  @use_texture = true
  puts "Vertex lights, texture shading"
end

def draw
  background(0)

  x = 1.88 * CAN_SIZE
  y = 2 * CAN_SIZE
  3.times do
    3.times do
      draw_can(x, y, angle)
      x += (2 * CAN_SIZE + 8)
    end
    x = 1.88 * CAN_SIZE
    y += (2 * CAN_SIZE + 5)
  end

  @angle += 0.01
end

def draw_can( centerx, centery, rot_angle)
  push_matrix

  if (use_light)
    point_light(255, 255, 255, centerx, centery, 200)
  end
  shader(sel_shader)

  translate(centerx, centery, 65)
  rotate_y(rot_angle)
  if (use_texture)
    can.set_texture(label)
  else
    can.set_texture(nil)
  end
  shape(can)
  no_lights

  reset_shader

  push_matrix
  translate(0, CAN_SIZE - 5, 0)
  shape(cap)
  pop_matrix

  push_matrix
  translate(0, -CAN_SIZE + 5, 0)
  shape(cap)
  pop_matrix

  pop_matrix
end

def create_can(r, h, detail, tex)
  texture_mode(NORMAL)
  sh = create_shape
  sh.begin_shape(QUAD_STRIP)
  sh.no_stroke
  sh.texture(tex)
  (0 .. detail).each do |i|
    angle = TAU / detail
    x = sin(i * angle)
    z = cos(i * angle)
    u = i.to_f / detail
    sh.normal(x, 0, z)
    sh.vertex(x * r, -h/2, z * r, u, 0)
    sh.vertex(x * r, +h/2, z * r, u, 1)
  end
  sh.end_shape
  return sh
end

def create_cap(r, detail)
  sh = create_shape
  sh.begin_shape(TRIANGLE_FAN)
  sh.no_stroke
  sh.fill(128)
  sh.vertex(0, 0, 0)
  (0 ... detail).each do |i|
    angle = TAU / detail
    x = sin(i * angle)
    z = cos(i * angle)
    sh.vertex(x * r, 0, z * r)
  end
  sh.end_shape
  return sh
end

def key_pressed
  case key
  when '1'
    puts "No lights, no texture shading"
    @sel_shader = color_shader
    @use_light = false
    @use_texture = false
  when '2'
    puts "Vertex lights, no texture shading"
    @sel_shader = light_shader
    @use_light = true
    @use_texture = false
  when '3'
    puts "No lights, texture shading"
    @sel_shader = tex_shader
    @use_light = false
    @use_texture = true
  when '4'
    puts "Vertex lights, texture shading"
    @sel_shader = texlight_shader
    @use_light = true
    @use_texture = true
  when '5'
    puts "Pixel lights, no texture shading"
    @sel_shader = pixlight_shader
    @use_light = true
    @use_texture = false
  when '6'
    puts "Pixel lights, texture shading"
    @sel_shader = texlightx_shader
    @use_light = true
    @use_texture = true
  when '7'
    puts "Black&white texture filtering"
    @sel_shader = bw_shader
    @use_light = false
    @use_texture = true
  when '8'
    puts "Edge detection filtering"
    @sel_shader = edges_shader
    @use_light = false
    @use_texture = true
  when '9'
    puts "Emboss filtering"
    @sel_shader = emboss_shader
    @use_light = false
    @use_texture = true
  end
end

Emboss Filtering

Friday, 25 October 2013

Low Level GL Shader Sketch in Ruby-Processing

Here is a sketch translated from the vanilla processing examples (where to get frag.gsl and vert.gsl), to run on the latest version of ruby-processing.
include_package 'java.nio'
java_import 'processing.opengl.PGL'


attr_reader :sh, :vert_loc, :color_loc, :vert_data, :color_data

def setup
  size(640, 360, P3D)

  # Loads a shader to render geometry w/out
  # textures and lights.
  @sh = loadShader("frag.glsl", "vert.glsl")
  @vert_data = allocate_direct_float_buffer(12)
  @color_data = allocate_direct_float_buffer(12)
end

def draw
  background(0)

  # The geometric transformations will be automatically passed 
  # to the shader.
  rotate(frame_count * 0.01, width, height, 0)

  update_geometry

  pgl = beginPGL
  sh.bind

  @vert_loc = pgl.getAttribLocation(sh.glProgram, "vertex")
  @color_loc = pgl.getAttribLocation(sh.glProgram, "color")

  pgl.enableVertexAttribArray(vert_loc)
  pgl.enableVertexAttribArray(color_loc)

  pgl.vertexAttribPointer(vert_loc, 4, PGL.FLOAT, false, 0, vert_data)
  pgl.vertexAttribPointer(color_loc, 4, PGL.FLOAT, false, 0, color_data)

  pgl.drawArrays(PGL.TRIANGLES, 0, 3)

  pgl.disableVertexAttribArray(vert_loc)
  pgl.disableVertexAttribArray(color_loc)

  sh.unbind

  endPGL
end

def update_geometry
  # Vertex 1
  vertices = [0, 0, 0, 1]
  colors = [1, 0, 0, 1]

  # Corner 2
  vertices += [width/2, height, 0, 1]
  colors += [0, 1, 0, 1]

  # Corner 3
  vertices += [width, 0, 0, 1]
  colors += [0, 0, 1, 1]

  vert_data.rewind
  vert_data.put(vertices.to_java :float)
  vert_data.position(0)

  color_data.rewind
  color_data.put(colors.to_java :float)
  color_data.position(0)
end

def allocate_direct_float_buffer(n)
  ByteBuffer.allocateDirect(n * java.lang.Float::SIZE/8).order(ByteOrder.nativeOrder).asFloatBuffer
end

Monday, 21 October 2013

Penrose Snowflake Revisited

The 1st time I revisited this sketch was in response to some refactoring by Dan Myer see http://learning-ruby-processing.blogspot.co.uk/2010/01/refactoring-my-penrose-snowflake.html. Since the advent of OPENGL for two dimensional sketches, that is all old hat, since we no longer need to keep generating the geometry, we can create a shape and reuse it (multiple times in the same sketch if need be). So here we use a generic grammar library for simple lsystems:-
############################
# Simple lsystem grammar
############################
class Grammar

  attr_reader :axiom, :rules
  def initialize(axiom, rules)
    @axiom = axiom
    @rules = rules
  end

  def expand(production, iterations, &block)
    production.each_char do |token|
      if rules.has_key?(token) && iterations > 0
        expand(rules[token], iterations - 1, &block)
      else
        yield token
      end
    end
  end

  def each gen
    expand(axiom, gen) {|token| yield token }
  end

  def generate gen
    output = []
    each(gen){ |token| output << token }
    return output
  end

end


Here is the animation code adapted from a processing example:-
# A class to describe a Polygon (with a PShape)

class Polygon
  include Processing::Proxy
  # The PShape object
  attr_reader :s, :x, :y, :speed, :height

  def initialize(s_, width, height)
    @x = rand(width)
    @y = rand(height * -1.5 .. -height / 3)
    @s = s_
    @speed = rand(2 .. 6)
    @height = height
  end

  # Simple motion
  def move
    @y +=speed
    @y = -100 if (y > height + 100)
  end

  # Draw the object
  def display
    push_matrix
    translate(x, y)
    shape(s)
    pop_matrix
  end

  def run
    display
    move
  end
end


Here is the penrose snowflake
load_libraries :grammar, :polygon

class PenroseSnowflake
  include Processing::Proxy
  import 'grammar'

  attr_accessor :axiom, :grammar, :start_length, :theta, :production, :draw_length,
  :repeats, :xpos, :ypos
  DELTA = Math::PI / 10 # 18 degrees as radians

  def initialize width
    reset width
  end

  def reset width
    @axiom = "F3-F3-F3-F3-F"
    @grammar = Grammar.new( axiom,
      {"F" => "F3-F3-F45-F++F3-F"}
      )
    @start_length = width / 40
    @theta = 0
    @xpos = width / 80
    @ypos = 0
    @draw_length = start_length
  end

  ##############################################################################
  # Parses the production string, and draws a line when 'F' is found, uses
  # trignometry to calculate dx and dy rather than processing transforms
  ##############################################################################

  def create_flake production
    flake = create_shape
    fil = [200, 220, 255].sample
    flake.begin_shape
    flake.fill fil
    flake.stroke fil
    flake.vertex(xpos, ypos)
    repeats = 1
    production.each do |element|
      case element
      when 'F'
        flake.vertex(@xpos -= multiplier(repeats, :cos), @ypos += multiplier(repeats, :sin))
        repeats = 1
      when '+'
        @theta += DELTA * repeats
        repeats = 1
      when '-'
        @theta -= DELTA * repeats
        repeats = 1
      when '3', '4', '5'
        repeats += element.to_i
      else
        puts "Character '#{element}' is not in grammar"
      end
    end
    flake.end_shape CLOSE
    return flake
  end

  ##########################################
  # adjust draw length with number of repeats
  # uses grammar to set production string 
  # see 'grammar.rb'
  ##########################################

  def create_grammar(gen)
    @draw_length *= 0.4**gen
    @production = grammar.generate gen
  end

  ###########################################
  # a helper method that returns dx or dy with type & repeat
  # multiplier after Dan Mayer
  ###########################################

  def multiplier(repeats, type)
    value = draw_length * repeats
    # using equal? for identity comparison
    (type.equal? :cos)?  value * cos(theta) : value *  sin(theta)
  end
end

##
# Lindenmayer System in ruby-processing by Martin Prout
# Very loosely based on a processing Penrose L-System
# by Geraldine Sarmiento
###

attr_reader :polygons

def setup
  size displayWidth, displayHeight, P2D
  #stroke 255
  flakes = []
  @polygons = []
  penrose = PenroseSnowflake.new width
  (2 .. 4).each do |i|
    production = penrose.create_grammar(i)
    flakes << penrose.create_flake(production)
    penrose.reset width
  end
  40.times do
    polygons << Polygon.new(flakes.sample, width, height)
  end
end

def draw
  background 0
  # Display and move them all
  polygons.each do |poly|
    poly.run
  end
end


Wednesday, 16 October 2013

Graphic Exploration of Jruby tuning in ruby-processing

The esfera sketch in vanilla processing is in the demo (performance category) and has proved to an interesting test case for various perfomance tune-ups in jruby. For this sketch the rolling fps is a good measure of performance.

 java_args.txt

None
Args 1. -XX:+TieredCompilation XX:CompileCommand=dontinline,org.jruby.runtime.invokedynamic.InvokeDynamicSupport::invocationFallback
Args 2. -XX:+TieredCompilation -XX:TieredStopAtLevel=1 XX:CompileCommand=dontinline,org.jruby.runtime.invokedynamic.InvokeDynamicSupport::invocationFallback


F.P.S esfera
No Args Args 1 Args 2
5.4547 5.17617 4.70084
4.26695 3.71662 2.90269
3.85179 3.22197 2.30053
3.769622 3.105720 2.077115
3.769622 3.122121 2.022429
3.756052 3.340643 1.940190
4.849481 3.122121 1.953019
5.173814 3.34064

Thereafter no args stabilized at ca 5.4 fps whereas "Args 1" stabilized at ca 5.7 fps. So compilation Tiered compilation beyond level 1 gives best performance, eventually.

Tuesday, 8 October 2013

Multiple panels example grafica library

Sometime using array as method args is not such a good idea, here we need to explicitly cast our ruby arrays to Java::float arrays.
load_library :grafica
include_package 'grafica'

N_POINTS = 21

def setup
  size(500, 500)
  background(255)

  first_plot_pos = [0, 0]
  panel_dim = [200, 200]
  margins = [60, 70, 40, 30]

  # Create four plots to represent the 4 panels
  plot1 = GPlot.new(self)
  plot1.set_pos(first_plot_pos.to_java(Java::float))
  plot1.set_mar([0, margins[1], margins[2], 0])
  plot1.set_dim(panel_dim.to_java(Java::float))
  plot1.set_axes_offset(0)
  plot1.set_ticks_length(-4)
  plot1.getXAxis.set_draw_tick_labels(false)

  plot2 = GPlot.new(self)
  plot2.set_pos(first_plot_pos[0] + margins[1] + panel_dim[0], first_plot_pos[1])
  plot2.set_mar([0, 0, margins[2], margins[3]])
  plot2.set_dim(panel_dim.to_java(Java::float))
  plot2.set_axes_offset(0)
  plot2.set_ticks_length(-4)
  plot2.getXAxis.set_draw_tick_labels(false)
  plot2.getYAxis.set_draw_tick_labels(false)
  plot3 = GPlot.new(self)
  plot3.set_pos(first_plot_pos[0], first_plot_pos[1] + margins[2] + panel_dim[1])
  plot3.set_mar([margins[0], margins[1], 0, 0])
  plot3.set_dim(panel_dim.to_java(Java::float))
  plot3.set_axes_offset(0)
  plot3.set_ticks_length(-4)
  plot4 = GPlot.new(self)
  plot4.set_pos(first_plot_pos[0] + margins[1] + panel_dim[0], first_plot_pos[1] + margins[2] + panel_dim[1])
  plot4.set_mar([margins[0], 0, 0, margins[3]])
  plot4.set_dim(panel_dim.to_java(Java::float))
  plot4.set_axes_offset(0)
  plot4.set_ticks_length(-4)
  plot4.getYAxis.set_draw_tick_labels(false)

  # Prepare the points for the four plots
  points1 = GPointsArray.new(N_POINTS)
  points2 = GPointsArray.new(N_POINTS)
  points3 = GPointsArray.new(N_POINTS)
  points4 = GPointsArray.new(N_POINTS)

 N_POINTS.times do |i|
    points1.add(sin(TAU*i/(N_POINTS-1)), cos(TAU*i/(N_POINTS-1)))
    points2.add(i, cos(TAU*i/(N_POINTS-1)))
    points3.add(sin(TAU*i/(N_POINTS-1)), i)
    points4.add(i, i)
 end

  # Set the points, the title and the axis labels
  plot1.set_points(points1)
  plot1.getYAxis.set_axis_label_text("cos(i)")
  plot1.set_title_text("Plot with multiple panels")
  plot1.get_title.set_relative_pos(1)
  plot1.get_title.set_text_alignment(CENTER)

  plot2.set_points(points2)

  plot3.set_points(points3)
  plot3.getXAxis.set_axis_label_text("sin(i)")
  plot3.getYAxis.set_axis_label_text("i")
  plot3.setInvertedYScale(true)

  plot4.set_points(points4)
  plot4.getXAxis.set_axis_label_text("i")
  plot4.setInvertedYScale(true)

  # Draw the plots
  plot1.begin_draw
    plot1.draw_box
    plot1.drawXAxis
    plot1.drawYAxis
    plot1.draw_top_axis
    plot1.draw_right_axis
    plot1.draw_title
    plot1.draw_points
    plot1.draw_lines
  plot1.end_draw

  plot2.begin_draw
    plot2.draw_box
    plot2.drawXAxis
    plot2.drawYAxis
    plot2.draw_top_axis
    plot2.draw_right_axis
    plot2.draw_points
    plot2.draw_lines
  plot2.end_draw

  plot3.begin_draw
    plot3.draw_box
    plot3.drawXAxis
    plot3.drawYAxis
    plot3.draw_top_axis
    plot3.draw_right_axis
    plot3.draw_points
    plot3.draw_lines
  plot3.end_draw

  plot4.begin_draw
    plot4.draw_box
    plot4.drawXAxis
    plot4.drawYAxis
    plot4.draw_top_axis
    plot4.draw_right_axis
    plot4.draw_points
    plot4.draw_lines
  plot4.end_draw
end

Since updated for JRubyArt

Monday, 7 October 2013

Reading csv data into a grafica sketch in ruby-processing

The clear superiority of ruby-processing in dealing with csv data is self evident in this sketch. Get the grafica library by jagracar here.
require 'csv'
load_library :grafica
include_package 'grafica'

MONTH_NAMES = %w(January February March April May June July August September October November December)
DAYS_PER_MONTH = [31,28,31,30,31,30,31,31,30,31,30,31]
DAYS_PER_MONTH_LEAP_YEAR = [31,29,31,30,31,30,31,31,30,31,30,31]

attr_reader :plot, :points_oktoberfest, :points_elections

def setup
  size(800, 400)

  # Load the Oktoberfest vs. Bundestagswahl (German elections day) Google 
  # search history file (obtained from the Google trends page). 
  # The csv file has the following format: 
  # year,month,day,oktoberfest,bundestagswahl
  # 2004,0,1,5,1
  # ...
  @points_oktoberfest = GPointsArray.new
  @points_elections = GPointsArray.new


  data = CSV.read("data/OktoberfestVSGermanElections.csv", :headers => true).map{|row| row.to_hash}
  data.each do |row|
    # You access the values via their column name (set by using headers option above)
    year = row["year"].to_i
    month = row["month"].to_i
    day = row["day"].to_i
    date = get_exact_date(year, month, day)
    oktoberfest_count = row["oktoberfest"].to_i
    elections_count = row["bundestagswahl"].to_i
    points_oktoberfest.add(date, oktoberfest_count, MONTH_NAMES[month])
    points_elections.add(date, elections_count, MONTH_NAMES[month])
  end
  # Create the plot
  @plot = GPlot.new(self)
  plot.set_dim(700, 300)
  plot.set_title_text("Oktoberfest vs. Bundestagwahl Google search history")
  plot.getXAxis.set_axis_label_text("Year")
  plot.getYAxis.set_axis_label_text("Google normalized searches")
  plot.getXAxis.setNTicks(10)
  plot.set_points(points_oktoberfest)
  plot.set_line_color(color(100, 100, 100))
  plot.add_layer("German elections day", points_elections)
  plot.get_layer("German elections day").set_line_color(color(255, 100, 255))
  plot.activate_point_labels
end

def draw
  background(255)

  # Draw the plot  
  plot.begin_draw
  plot.draw_box
  plot.drawXAxis
  plot.drawYAxis
  plot.draw_title
  plot.draw_grid_lines(GPlot::VERTICAL)
  plot.draw_filled_contours(GPlot::HORIZONTAL, 0)
  plot.draw_legend(%w(Oktoberfest Bundestagswahl),
    [0.07,0.22],
    [0.92, 0.92])
  plot.draw_labels
  plot.end_draw
end

def get_exact_date(year, month, day)
 leap_year = false
 if (year % 400 == 0)
  leap_year = true
 elsif (year % 100 == 0)
  leap_year = false
 elsif (year % 4 == 0)
  leap_year = true
 end
 if leap_year
  return year + (month + (day - 1) / DAYS_PER_MONTH_LEAP_YEAR[month]) / 12.0
  else
    return year + (month + (day - 1)/ DAYS_PER_MONTH[month]) / 12.0
  end
end

Since updated for JRubyArt

Using the grafica library in ruby-processing

Get the grafica library by jagracar here.
load_library :grafica

include_package 'grafica'

POINTS = 100

def setup
  size(500, 350)
  background(150)

  # Prepare the points for the plot
  points = GPointsArray.new(POINTS)

  POINTS.times do |i|
    points.add(i, 10 * noise(0.1 * i))
  end

  # Create a new plot and set its position on the screen
  plot = GPlot.new(self)
  plot.set_pos(25, 25)

  # Set the plot title and the axis labels
  plot.set_points(points)
  plot.getXAxis.setAxisLabelText("x axis")
  plot.getYAxis.setAxisLabelText("y axis")
  plot.setTitleText("A very simple example")

  # Draw it!
  plot.default_draw
end

The output
Since updated for JRubyArt

Saturday, 5 October 2013

A custom Vector library for ruby processing

I recently got my copy of Practical Object Oriented Design in Ruby by Sandi Metz book, this got me thinking what could I could apply the ideas to in ruby-processing, and here is an early crack at it. Creating a custom (pure-ruby) vector library which can replace the hybrid RPVector (that extends PVector from processing) class of a previous post. This is very much a first crack (but it works, only difference needed is load_library :vec and use normalize! instead of normalize, much more ruby like I think) because I have ideas for extending the functionality along some of these lines, however my sentiment is with toxi re simple made easy. Further if I use vanilla processing logic the cross_product method (modulus, dist etc) could all live in Vec, but I can easily defer that decision. I haven't at this stage made use distance_squared externally, however this will be more efficient for testing boundary conditions of say a bouncing ball than regular dist. Not shown here are the rspec tests that I've been using to ensure the code behaves, I am tempted to bundle this and a Quaternion class and possibly some others as a core ruby-processing library, since the operations of PVector are not at all ruby like, and many more people seem to come to ruby-processing from ruby, not the other way round sadly.
class Vec
  attr_accessor :x, :y, :z
  EPSILON = 9.999999747378752e-05     # a value used by processing.org
  def initialize(x = 0 ,y = 0, z = 0)
    @x, @y, @z = x, y, z
    post_initialize
  end

  def post_initialize
    nil
  end

  def ==(vec)
    (x - vec.x).abs < EPSILON && (y - vec.y).abs < EPSILON && (z - vec.z).abs < EPSILON
  end
end


class Vec2D < Vec

  # Modulus of vec. Also known as length, size or norm
  def modulus
    Math.hypot(x, y)
  end

  def self.dist_squared(vec_a, vec_b)
    (vec_a.x - vec_b.x)**2 + (vec_a.y - vec_b.y)**2
  end

  def self.dist(vec_a, vec_b)
    Math.hypot(vec_a.x - vec_b.x, vec_a.y - vec_b.y)
  end

  # vanilla processing returns a Vector, rather than Scalar (defaults to 3D result when z = 0)
  def cross_product(vec)
    x * vec.y - y * vec.x
  end

  # Scalar product, also known as inner product or dot product
  def dot(vec)
    x * vec.x + y * vec.y
  end

  def collinear_with?(vec)
    cross_product(vec).abs < EPSILON
  end

  def +(vec)
    Vec2D.new(x + vec.x, y + vec.y)
  end

  def -(vec)
    Vec2D.new(x - vec.x, y - vec.y)
  end

  def *(scalar)
    Vec2D.new(x * scalar, y * scalar)
  end

  def / (scalar)
    Vec2D.new(x / scalar, y / scalar) unless scalar == 0
  end

  def normalize!
    @x, @y = x / modulus, y / modulus
    return self
  end

  alias :mag :modulus

end

class Vec3D < Vec

  def modulus
    Math.sqrt(x**2 + y**2 + z**2)
  end

  def self.dist_squared(vec_a, vec_b)
    (vec_a.x - vec_b.x)**2 + (vec_a.y - vec_b.y)**2 + (vec_a.z - vec_b.z)**2
  end

  def self.dist(vec_a, vec_b)
    Math.sqrt(self.dist_squared(vec_a, vec_b))
  end


  def cross_product(vec)
    xc = y * vec.z - z * vec.y
    yc = z * vec.x - x * vec.z
    zc = x * vec.y - y * vec.x
    Vec3D.new(xc, yc, zc)
  end

  # Scalar product, also known as inner product or dot product
  def dot(vec)
    x * vec.x + y * vec.y + z * vec.z
  end

  def collinear_with?(vec)
    cross_product(vec) == Vec3D.new
  end

  def +(vec)
    Vec3D.new(x + vec.x, y + vec.y, z + vec.z)
  end

  def -(vec)
    Vec3D.new(x - vec.x, y - vec.y, z - vec.z)
  end

  def * (scalar)
    Vec3D.new(x * scalar, y * scalar, z * scalar)
  end

  def / (scalar)
    Vec3D.new(x / scalar, y / scalar, z / scalar) unless scalar.abs < EPSILON
  end

  def normalize!
    @x, @y, @z = x / modulus, y / modulus, z / modulus
    return self
  end

  alias :mag :modulus
end

A Little Test courtesy of Daniel Shiffman
#
# Vector 
# by Daniel Shiffman.  
# 
# Demonstration some basic vector math: subtraction, normalization, scaling
# Normalizing a vector sets its length to 1.
#
load_library :vec

def setup
  size(640,360)
end

def draw
  background(0)

  # A vector that points to the mouse location
  mouse = Vec2D.new(mouse_x, mouse_y)
  # A vector that points to the center of the window
  center = Vec2D.new(width/2,height/2)
  # Subtract center from mouse which results in a vector that points from center to mouse
  mouse = mouse - center # note need assign result to mouse

  # Normalize the vector the ! means we are changing the value of mouse
  mouse.normalize!

  # Multiply its length by 150 (Scaling its length)
  mouse = mouse * 150 # note need assign the result to mouse

  translate(width/2,height/2)
  # Draw the resulting vector
  stroke(255)
  stroke_weight(4)
  line(0, 0, mouse.x, mouse.y)
end
Now interestingly the following also works so you can use the
+=, -=, /=, and *= assignment methods ( but you cannot override += etc as a methods unlike C++ )
So what this means is that in ruby += etc are just syntactic shortcuts, and not an operator in its own right (which is probably a good thing).
#
# Vector 
# by Daniel Shiffman.  
# 
# Demonstration some basic vector math: subtraction, normalization, scaling
# Normalizing a vector sets its length to 1.
#
load_library :vec

def setup
  size(640,360)
end

def draw
  background(0)

  # A vector that points to the mouse location
  mouse = Vec2D.new(mouse_x, mouse_y)
  # A vector that points to the center of the window
  center = Vec2D.new(width/2,height/2)
  # Subtract center from mouse which results in a vector that points from center to mouse
  mouse -= center  # note we can assign result to mouse using -=

  # Normalize the vector the ! means we are changing the value of mouse
  mouse.normalize!

  # Multiply its length by 150 (Scaling its length)
  mouse *= 150 # note we can assign result to mouse using *=

  translate(width/2,height/2)
  # Draw the resulting vector
  stroke(255)
  stroke_weight(4)
  line(0, 0, mouse.x, mouse.y)

end

Thursday, 3 October 2013

Checking out jruby-complete-9000.dev.jar (waiting for jruby-1.7.5)

I just tested the 2 October 2013 snapshot of jruby-complete-9000 with ruby-processing, so far so good (still issue with fisica library that I had thought had gone away with jruby-1.7.5.dev, but I might have been using my "corrected" version of the fisica library, anyway I will be interested to see the effect of Charlies pruning basically removing ruby-1.8.7 compatibility). I've also been reviewing "app.rb", with a view to being a bit more specific about which processing classes to import. Having failed abysmally to make any use of processing event classes directly, they are in firing line. Also I will only import opengl classes for P2D and P3D sketches (work in progress, will be ready for next ruby-processing commit to coincide with jruby-1.7.5 release). On the processing front a new release of vanilla processing may not be too far away either (at long last, and then probably only because of the Mac Retina display issue, java version is going to be upgraded to version 1.7.0_40).

Followers

Blog Archive

About Me

My photo
I have developed JRubyArt and propane new versions of ruby-processing for JRuby-9.1.5.0 and processing-3.2.2