Experiments with ruby-processing (processing-2.2.1) and JRubyArt for processing-3.0

Thursday, 1 December 2011

GLGraphics in ruby-processing post processing (GLSL Fish Eye shader)


# This example applies a post-processing texture filter to the offscreen canvas
# in order to generate an angular fish-eye effect.
# Based on the following discussion thread in the Processing forum:
# http://forum.processing.org/topic/angular-fisheye
# Some other resources about fish-eye projections:
# 1) Excellent article from Paul Bourke on the math behind the angular fish-eye mapping  
# http://paulbourke.net/miscellaneous/domefisheye/fisheye/
# 2) Fish-eye effect implemented as a GLSL vertex shader:
# http://pixelsorcery.wordpress.com/2010/07/13/fisheye-vertex-shader/
# 3) Another fish-eye GLSL shader (didn't test it though):
# http://pages.cpsc.ucalgary.ca/~brosz/wiki/pmwiki.php/CSharp/08022008

load_libraries 'opengl', 'GLGraphics'
include_package "codeanticode.glgraphics"


attr_reader :canvas, :fisheye, :tex

def setup()
  size(300, 300, GLConstants.GLGRAPHICS)
  # If your video card isn't up to it use following (no antialias)
  #@canvas = GLGraphicsOffScreen.new(self, width, height)    
  @canvas = GLGraphicsOffScreen.new(self, width, height, true, 4)

  # Destination texture to store the fisheye image.
  @tex = GLTexture.new(self)

  @fisheye = GLTextureFilter.new(self, "FishEye.xml")
  # The aperture angle is specified in degrees. Values
  # greater than 180 can be specified, but the result won't
  # be consistent since the mapping is not one-to-one in
  # that case.
  fisheye.set_parameter_value("aperture", 180.0)
end

def draw()
  # Generating offscreen rendering:
  canvas.begin_draw
  canvas.background(0)
  canvas.lights
  canvas.stroke(255, 0, 0)
  (0...height).step(10) {|i| canvas.line(i, 0, i, height)}
  (0...width).step(10) {|j| canvas.line(0, j, width, j)}
  canvas.no_stroke
  canvas.translate(mouse_x, mouse_y, 100)
  canvas.rotate_x(frame_count * 0.01)
  canvas.rotate_y(frame_count * 0.01)
  canvas.box(50)
  canvas.end_draw
  fisheye.apply(canvas.get_texture(), tex)
  image(tex, 0, 0, width, height)
end

This is is an example included with vanilla processing GLGraphics library be sure to copy the shader files from the GLGraphics/Examples/Output/FishEye/data into a data folder (where fish_eye.rb is saved). See also faux fish eye here.

Saturday, 26 November 2011

Further Prototyping of my Povwriter Library in ruby-processing

Update 22 December I have gone on to modify my java povwriter library, incorporating some of ideas developed here. This sketch is incompatible with that new library, however old library is still available here.

It really is much easier to prototype in ruby/ruby processing vs java/vanilla processing. Recently I had the idea of splitting up the povray files as follows:-
  1. pov.ini to hold size (resolution) and quality (ray-trace parameter
  2. pov.pov to hold template (camera/background etc)
  3. pov.inc to hold mesh data etc from the processing sketch
In this iteration of prototyping I get to do 1 and 2, as 3 will involve a rewrite of my povwriter library, which I'm putting off until is clear whether beginRaw/endRaw will work in processing 2.0 (scheduled for release in Spring 2012?). I have decided less is definetly more for my gui, there are now only 3 quality options and the raytrace button now also initiates the recording of the PovRAY files as well as starting PovRAY. Further I've split the ini writer/povray runner into a new class as follows:-


# Demonstrates how you can use my povwriter libary
# in Ruby-Processing, to export to PovRAY

load_libraries 'povwriter', 'control_panel'
import 'povexport'
require 'ini_writer'

DATA = [-1, 0, 1]
attr_reader :exporter, :precord, :pquality, :type, :pview, :povfile

def setup
  size 1000, 1000, P3D
  @povfile = "balls.pov"
  @precord = false
  @pview = false
  @exporter = PovExporter.new self
  control_panel do |c|
    c.title = "Render as PovRAY"
    c.menu(:quality, ['instant', 'medium', 'high'], 'instant') {|m| load_quality_choice(m) }
    c.button :choose_template
    c.button :raytrace
    c.button :exit!
  end
  # uncomment next enter the path to povray executable on mac/windows/linux (or possibly jedit linux)  
  exporter.set_povray_path('/usr/local/bin/povray') # choice is saved in '.povwriter/povwriter.properties'
  # uncomment following line to adjust degenerate triangle cut off (area squared)
  # export.set_epsilon("0.001")
  exporter.store_settings    # uncomment this line to save settings   
  no_stroke
  sphere_detail(18)
end

def draw
  lights          # this needs to be outside the record loop
  if (precord)
    no_lights     # let PovRAY do the lighting
    no_loop       # don't loop while recording sketch
    begin_raw("povexport.RawPovray", data_path(povfile))
  end
  if pview
    pov_image = load_image(data_path(povfile.gsub("pov", "png")))
    update_pixels
    background(255) # clear the screen   
    image(pov_image, 0, 0)
  else
    render
  end
  if (precord)
    end_raw
    @precord = false
    puts "done recording"
    trace = IniWriter.new(data_path(povfile), width, height, pquality)
    trace.raytrace exporter.get_povray_path
    @pview = true
  end
end

def exit!
  exit
end

def render()
  background(0)
  translate(width*0.7, height/2, -width)
  DATA.each do |y|
    DATA.each do |x|
      DATA.each do |z|
        push_matrix
        translate(120*x, 120*y, 120*z)
        fill(rand * 255, rand * 255, rand * 255) # a nice test for my colorFactory class
        exporter.sphere(60) # use a better sphere primitive for ray tracing
        pop_matrix
      end
    end
  end
end


################################### Independent of sketch ############################

def raytrace
  @precord = true
end

def choose_template
  exporter.choose_template
end

def load_quality_choice(item)
  @pquality = item
end


Here is the ini writer class..................

require 'pathname'

INI = {'instant' => 'quick.ini', 'medium' => 'medium.ini', 'high' => 'quality.ini'}
QUALITY = {'instant' => 4, 'medium' => 6, 'high' => 11}

class IniWriter

  attr_reader :name, :width, :height, :qual, :base, :ini
 def initialize name, width, height, qual
   @name, @width, @height, @qual = name, width, height, qual
   init
 end

 def init
   @base = File.dirname(name)
   if (QUALITY[qual] < 6 && width > 300)
     @height *= 300.0/width
     @width = 300
   end
 end

 def write
   @ini = File.join(base, INI[qual])
   file = open(ini, 'w')
   file.puts("; #{ini}")
   file.puts("Input_File_Name='#{name}'")
   file.puts("width=#{width}")
   file.puts("height=#{height}")
   file.puts("quality=#{QUALITY[qual]}")
   file.puts("Antialias=true") unless QUALITY[qual] < 10
   file.puts("Output_File_Type=N8")
   file.puts("Output_File_Name='#{name.gsub('pov', 'png')}'")
   file.close
 end

 def raytrace povray_path
   write
   system([povray_path, ini].join(" "))
 end
end


Wednesday, 16 November 2011

Exporting Sketches from Ruby-Processing to PovRAY, features control panel

It has taken a lot longer that it should have done, but finally I got round to exploring my vanilla processing povwriter library in ruby processing. Thanks to the latest version of ruby-processing, we can use the vanilla processing library from the sketchbook folder. This works fine and dandy at present, but I can foresee potential conflicts with libraries that have been modified to run with processing-2.0, but then lots of libraries are probably going to get screwed along the way to the new version (my povwriter library for one does not work with processing-2.0). Here's one of my povwriter example files translated to ruby:-


# Demonstrates how you can use my povwriter libary
# in Ruby-Processing, to export to PovRAY

load_libraries 'povwriter', 'control_panel'
import 'povexport'

DATA = [-1, 0, 1]
attr_reader :exporter, :precord, :pquality, :type, :pview, :memory, :povfile

def setup
  size 300, 300, P3D
  @povfile = "balls.pov"
  @precord = false
  @exporter = PovExporter.new self
  control_panel do |c|
    c.title = "Render as PovRAY"
    c.menu(:quality, ['low', 'medium', 'high', 'highest'], 'high') {|m| load_quality_choice(m) }
    c.menu(:image_type, ['png', 'jpeg', 'tga'], 'png') {|m| load_image_type(m) }
    c.menu(:memory, ['low', 'default', 'high', 'none'], 'default') {|m| load_memory_choice(m) }
    c.checkbox :antialias
    c.button :choose_template
    c.button :record
    c.button :raytrace
    c.button :view
    c.button :exit!
  end
  # uncomment next enter the path to povray executable on mac/windows/linux (or possibly jedit linux)  
  exporter.set_povray_path('/usr/local/bin/povray') # choice is saved in '.povwriter/povwriter.properties'
  # uncomment following line to adjust degenerate triangle cut off (area squared)
  # export.set_epsilon("0.001")
  exporter.store_settings    # uncomment this line to save settings   
  no_stroke
  sphere_detail(18)
end

def draw
  lights          # this needs to be outside the record loop
  if (precord)
    no_lights   # let PovRAY do the lighting
    no_loop       # don't loop while recording sketch
    begin_raw("povexport.RawPovray", data_path(povfile))
  end
  if pview
    background(0) # clear the screen
    image(load_image(data_path("balls.png")), 0, 0)
    no_loop
  else
    render
  end
  if (precord)
    end_raw
    @precord = false
    puts "done recording"
    loop
  end
end

def exit!
  exit
end

def render()
  background(0)
  translate(width*0.7, height/2, -width)
  DATA.each do |y|
    DATA.each do |x|
      DATA.each do |z|
        push_matrix
        translate(120*x, 120*y, 120*z)
        fill(rand * 255, rand * 255, rand * 255) # a nice test for my colorFactory class
        exporter.sphere(60) # use a better sphere primitive for ray tracing
        pop_matrix
      end
    end
  end
end

################################### Independent of sketch ############################
def record
  @precord = true
end

def raytrace
  Kernel.system([exporter.get_povray_path, povray_options, povray_scene].join(" "))
end

def choose_template
  exporter.choose_template
end

def view
  @pview = true
end

def povray_scene
  return "+I#{data_path(povfile)}"
end

def povray_options
  aa = @antialias ? "+A" : ""
  return "+IM#{memory} +W#{width} +H#{height} +Q#{pquality} #{aa} +F#{type}"
end


def load_quality_choice(item)
  map = {'low' => 0, 'medium' => 5, 'high' => 9, 'highest' => 11}
  @pquality = map[item]
end

def load_memory_choice(item)
  map = {'low' => 56, 'default' => 128, 'high' => 1024, 'none' => 0}
  @memory = map[item]
end

def load_image_type(item)
  map = {'png' => 'N', 'jpeg' => 'J', 'tga' => 'C'}
  @type = map[item]
end

Sketch now modified to use the excellent control panel of ruby-processing. Here I am using a custom sphere for raytracing, ideally I would just call the PovRAY sphere primitive, but that is a bit more complicated than it appears at first sight (see my vanilla processing blog). Presently everything is exported as a simple triangle mesh (ideally this would be a PovRAY mesh2 object). Make life easy for yourself and wrap drawing logic in a function such as render. Click on images below to see full size....

Live Display of PovRAY rendering

Viewing Rendered image in processing sketch


Tuesday, 12 July 2011

Rod Hilbert in Ruby-Processing (using homebaked libraries)

Here is sketch where I have created two small libraries, one in java that I have archived as jar, and one in ruby that is library just because I put in the library folder. The java library provides fast lookup tables for sin and cos, and the ruby library provides some code that is re-used a lot when I create lystems in ruby-processing.  Se the vanilla processing animation on my other blog. For your convenience I have provided these libaries here as a gist (NB: raw view of gist is required google has done something to the formatted code), as well as the sketch code:-


Thursday, 16 June 2011

Faux Fish Eye Lens in ruby-processing, features control panel

Sketches below show an unadulterated grid, a partial grid with fish eye 'filter' and some text with fish eye 'filter'. Unfortunately the mouse was doing two things (adjusting view and selecting image for 'the gimp') so actual captured image was a bit hit and miss. View the vanilla processing version at openprocessing.


############################
# fish_eye.rb 
# [Pseudo fisheye simulation]
# by Jonsku, September 2010
# From the article by Paul Bourke : http://local.wasp.uwa.edu.au/~pbourke/miscellaneous/domefisheye/fisheye/
#
# translated to ruby-processing by Martin Prout (June 2011) 
# Toggle fisheye, select view, adjust aperture using 'Control Panel'
# Move mouse to change camera position.
############################

require 'beauty'

class Fish_Eye < Processing::App
  load_library :control_panel
  attr_reader :b_pass, :fish_eye_filter, :aperture, :options, :some_text, :img

  def setup()
    size(300, 300)
    setup_control
    text_font(load_font("Ubuntu-Regular-48.vlw"))
    @some_text = "Whatever it is,\n it was inside the Sphere.\n Now it's out, free to act. "
    @img = load_image("pattern.png")
    @fish_eye_filter = false
    @b_pass = BeautyPass.new
    smooth
  end

  def draw()
    background(0)
    case options
    when 'grid'
      draw_grid(20)
    when 'text'
      draw_text
    when 'image'
      display_image
    when 'noise'
      draw_noise
    else
      draw_grid(20)
    end
    if fish_eye_filter
      fisheye
    end
  end

  def setup_control
    control_panel do |c|
      c.title = "Control Panel"
      c.button :t_fisheye
      c.menu(:options, ['grid', 'text', 'image', 'noise' ], 'grid')
      c.slider :aperture, 0.5..Math::PI, 3.142
    end
  end

  def t_fisheye
    @fish_eye_filter = !fish_eye_filter
  end

  def draw_grid(row)
    stroke(255)
    stroke_weight(2)
    for i in 0...row
      line(0, i * height / row, width, i * height / row)
      line(i * height / row, 0, i * height / row, height)
    end
  end

  def draw_text
    fill(0, 255, 0)
    text(some_text,sin(frame_count * 0.1)*(width - text_width(some_text)), 180+Math.sin(Math::PI/2 + frame_count*0.01)*(height-170))
  end

  def display_image
    image(img, 0, 0, width, height)
  end

  def draw_noise
    push_style
    color_mode(RGB,1.0)
    load_pixels
    (0...width).each do |i|
      (0...height).each do |j|
        pixels[i+j*width] = color(noise((frame_count+i)*0.1,j*0.1),noise((frame_count+i)*0.1,j*0.1,0.3),noise((frame_count+i)*0.05,j*0.05,0.6))
      end
    end
    update_pixels
    pop_style
  end

  def fisheye
    half_aperture = aperture / 2
    # define camera positioning normalized coordinates
    cam_x = (2.0 * mouse_x) / (width - 1)
    cam_y = (2.0 * mouse_y) / (width - 1)

    load_pixels
    (0...width).each do |i|
      #transform pixel coordinates to normalised coordinates, range -1 to 1
      x = (2.0 * i) / (width - 1)
      (0...height).each do |j|
        y = (2.0 * j) / (height - 1)
        #radius r to camera
        r = dist(cam_x, cam_y, x, y)
        #at this stage any pixels where r > 1 are ignored
        if (r.abs > 1)
          next
        end
        #angle phi to x axis
        phi = Math.atan2(y - cam_y, x - cam_x)
        #r is mapped onto theta and phi is used directly as the polar coordinates of the direction vector 
        # from the camera into the scene
        theta = half_aperture * r
        #transform normalised coordinates to pixel coordinates
        dx = map(Math.sin(theta) * Math.cos(phi), -1.0, 1, 0, width)
        dy = map(Math.sin(theta) * Math.sin(phi), -1.0, 1, 0, height)

        ##############
        # Because the pixel array uses integer coordinates, black empty pixels will appear in the resulting image.
        # To attempt to fix this, the destination pixel is calculated with 3x3 combinations of roundings (round-round, 
        # the final value will be the average colors. See BeautyPass, it will become clearer.
        # round.floor, round.ceil, floor.floor, floor-round, etc.). Thus one pixel might have several colors but that 
        # is taken into account and NOTE: This works ok for aperture up to 180 but above that it is not enough.
        ###############
        fx = dx.round
        fy = dy.round
        @b_pass.add_color(fx + fy * width, pixels[(i + j * width)])
        fx = dx.round
        fy = dy.floor
        @b_pass.add_color(fx + fy * width, pixels[(i + j * width)])
        fx = dx.round
        fy = dy.ceil
        @b_pass.add_color(fx + fy * width, pixels[(i + j * width)])
        fx = dx.floor
        fy = dy.floor
        @b_pass.add_color(fx + fy * width, pixels[(i + j * width)])
        fx = dx.floor
        fy = dy.round
        @b_pass.add_color(fx + fy * width, pixels[(i + j * width)])
        fx = dx.floor
        fy = dy.ceil
        @b_pass.add_color(fx + fy * width, pixels[(i + j * width)])
        fx = dx.ceil
        fy = dy.ceil
        @b_pass.add_color(fx + fy * width, pixels[(i + j * width)])
        fx = dx.ceil
        fy = dy.round
        @b_pass.add_color(fx + fy * width, pixels[(i + j * width)])
        fx = dx.ceil
        fy = dy.floor
        @b_pass.add_color(fx + fy * width, pixels[(i + j * width)])
      end
    end
    @b_pass.render
    @b_pass.reset
  end

end


############################
# beauty.rb (helper class), part of
# --=[Angular fisheye simulation]=--
# by Jonsku, September 2010
# From the article by Paul Bourke : http://local.wasp.uwa.edu.au/~pbourke/miscellaneous/domefisheye/fisheye/
#
# translated to ruby-processing by Martin Prout
#
# Move mouse to change camera position.
############################
class BeautyPass
  include Processing::Proxy

  attr_reader :counts, :rSums, :gSums, :bSums

  def initialize()
    reset()
  end

  def reset()
    @counts = Array.new(width * height, 0)
    @rSums = Array.new(width * height, 0)
    @gSums = Array.new(width * height, 0)
    @bSums = Array.new(width * height, 0)
  end

  def add_color(i, c)
    if (i>0 && i< width * height)
      @rSums[i] += c >> 16 & 0xFF
      @gSums[i] += c >> 8 & 0xFF
      @bSums[i] += c & 0xFF
      @counts[i] +=  1
    end
  end

  def render()
    load_pixels()
    (0...width * height).each do |i|
      if (counts[i]>0)
        pixels[i] = color(rSums[i] / counts[i], gSums[i] / counts[i], bSums[i] / counts[i])
      else
        pixels[i] = color(0) #background color
      end
    end
    update_pixels()
  end
end


Thursday, 5 May 2011

Exploring modelX in ruby processing


############################
# processing modelX
# examples in ruby processing
###########################


def setup
  size 500, 500, P3D
  no_fill
end

def draw
  background 0
 
  push_matrix
  # start at the middle of the screen
  translate(width/2, height/2, -200)    
  # some pseudo random rotation to make things interesting
  rotate_y 1.0 # yrot
  rotate_z 2.0 # zrot
  # rotate in X a little more each frame
  rotate_x(frame_count / 100.0)
  # offset from center
  translate(0, 150, 0)
 
  # draw a white box outline at (0, 0, 0)
  stroke 255
  box 80
 
  # the box was drawn at (0, 0, 0), store that location
  x = model_x(0, 0, 0)
  y = model_y(0, 0, 0)
  z = model_z(0, 0, 0)
  # clear out all the transformations
  pop_matrix

  # draw another box at the same (x, y, z) coordinate as the other
  push_matrix
  translate(x, y, z)
  stroke(255, 0, 0)
  box 80
  pop_matrix
end

Exploring screenX in ruby processing

I think there is a mistake in the version at the processing wiki (which I have flagged) because the 2D lines mentioned in the comments have six parameters (in my book that is 3D line even if Z is zero). You still get to see the parallax in my amended version, try it.


###################
# processing screenX example
# in ruby processing
###################

def setup
  size 100, 100, P3D
end

def draw
  background 204
  
  x = mouse_x
  y = mouse_y
  z = -100
  
  # Draw "X" at z = -100
  stroke 255
  line(x - 10, y - 10, z, x + 10, y + 10, z)
  line(x + 10, y - 10, z, x - 10, y + 10, z)
  
  # Draw line in 2D at same x value
  # Notice the parallax
  stroke 102
  line(x, 0, x, height)
  
  # Draw 2D line to match the x value
  # element drawn at z = -100
  stroke(0)
  the_x = screen_x(x, y, z)
  line(the_x, 0, the_x, height)    
end

Tuesday, 3 May 2011

Winged Edge Mesh and Physics from Toxiclibs

Here is the toxiclibs InflateMesh verlet physics example demonstrating winged mesh class functionality. Although this was a P3D sketch in the example it looks best using OPENGL. Because there is still an issue with linux and ruby-processing OPENGL at less than full_screen, I have scaled some of the variables in the sketch (mainly annotated I think), anyway you should probably look at the original (included in the library download toxiclibs-complete version 0020).


# <p>This example uses the attraction behavior to inflate a 3D mesh.
# The mesh vertices are re-created as physics particles and connected
# using springs. Upon mouse press the inflation force is applied,
# counteracting the forces created by the springs, causing the mesh to
# expand and deform.</p>
#
# <p>Usage: Click and hold mouse button to inflate mesh</p>
#

############
# Copyright (c) 2010 Karsten Schmidt translated to ruby processing by Martin Prout (Spring 2011)
#
# This demo & library is free software you can redistribute it and/or
# modify it under the terms of the GNU Lesser General Public
# License as published by the Free Software Foundation either
# version 2.1 of the License, or (at your option) any later version.
#
# http:#creativecommons.org/licenses/LGPL/2.1/
#
# This library is distributed in the hope that it will be useful,
# but WITHOUT ANY WARRANTY without even the implied warranty of
# MERCHANTABILITY or FITNESS FOR A PARTICULAR PURPOSE.  See the GNU
# Lesser General Public License for more details.
#
# You should have received a copy of the GNU Lesser General Public
# License along with this library if not, write to the Free Software
# Foundation, Inc., 51 Franklin St, Fifth Floor, Boston, MA  02110-1301  USA
#
class InflateMesh < Processing::App
  load_libraries 'toxiclibs_p5', 'toxiclibscore', 'verletphysics', 'opengl'
  include_package 'processing.opengl'
  include_package 'toxi.geom'
  include_package 'toxi.geom.mesh.subdiv'
  include_package 'toxi.geom.mesh'
  include_package 'toxi.physics'
  include_package 'toxi.physics.behaviors'
  include_package 'toxi.physics.constraints'
  include_package 'toxi.processing'

  attr_reader :physics, :inflate, :box, :gfx
  full_screen

  def setup
    setup_opengl
    @gfx = ToxiclibsSupport.new(self)
    init_physics
  end

  def draw
    @physics.update()
    for vert in box.vertices.values
      vert.set(physics.particles.get(vert.id))
    end
    box.center(nil)              # nil means centre at 0, 0, 0
    for vert in box.vertices.values
      @physics.particles.get(vert.id).set(vert)
    end
    box.compute_face_normals
    box.face_outwards
    box.compute_vertex_normals
    background(51)
    translate(width / 2, height / 2, 0)
    rotate_x((height / 2 - mouse_y) * 0.01)
    rotate_y((width / 2 - mouse_x) * 0.01)
    no_fill
    lights
    directional_light(255, 255, 255, -200, 1000, 500)
    specular(255)
    shininess(16)
    @gfx.origin(Vec3D.new, 300)  # scaled up axes display from 50
    fill(192)
    no_stroke
    @gfx.mesh(box, true, 10)     # scaled up normals display from 5
  end

  def init_physics
    @box = WETriangleMesh.new
    # create a simple start mesh
    #box.add_mesh(Cone.new(Vec3D.new(0, 0, 0), Vec3D.new(0, 1, 0), 10, 50, 100).to_mesh(4))
    @box.add_mesh(AABB.new(Vec3D.new, 150).to_mesh)      # scaled up from 50
    # then subdivide a few times...
    @box.subdivide
    @box.subdivide
    @box.subdivide
    @box.subdivide
    @physics = VerletPhysics.new
    @physics.set_world_bounds(AABB.new(Vec3D.new, 540))  # scaled up from 180
    # turn mesh vertices into physics particles
    for vert in box.vertices.values
      @physics.add_particle(VerletParticle.new(vert))
    end
    # turn mesh edges into springs
    for w_edge in box.edges.values
      vp_a = physics.particles.get(w_edge.a.id)
      vp_b = physics.particles.get(w_edge.b.id)
      @physics.add_spring(VerletSpring.new(vp_a, vp_b, vp_a.distance_to(vp_b), 0.05))
    end
  end

  def key_pressed     # using a switch anticipating more key actions
    case key
    when 'i'
    init_physics
    when 's'
    save_frame "inflate.png"
    end
  end


  def mouse_pressed
    @inflate=AttractionBehavior.new(Vec3D.new, 400, -0.3, 0.001)
    @physics.add_behavior(inflate)
  end

  def mouse_released
    @physics.remove_behavior(inflate)
  end

  def setup_opengl
    render_mode OPENGL
    hint ENABLE_OPENGL_4X_SMOOTH     # optional
    hint DISABLE_OPENGL_ERROR_REPORT # optional
  end
end


Monday, 2 May 2011

Using Hemesh Library in ruby-processing

It has been positively ages since I last posted any ruby-processing sketches here is one processing library that you might like to experiment with it is the Hemesh library by Frederik Vanhoutte aka W:Blut. Over on my other blog I have been describing the development of my latest processing library "povwriter" a tool for exporting processing sketches to the povray format and this is one of the sketches I have used.  Next I will attempt to get my "povwriter" library working in ruby processing.


# RandomCage.rb is a processing sketch that shows
# how you can use the Hemesh library in Ruby-Processing.


class RandomCage < Processing::App
  load_libraries 'hemesh', 'opengl'
  include_package 'wblut.hemesh'
  include_package 'wblut.hemesh.creators'
  include_package 'wblut.hemesh.iterators'
  include_package 'wblut.hemesh.modifiers'
  include_package 'wblut.hemesh.subdividors'

  import "processing.opengl"

  full_screen
  TWO_PI = Math::PI * 2
  attr_reader :cage

  def setup
    configure_opengl
    @cage = HE_Mesh.new(HEC_Box.new(self).set_depth(height/2).set_height(height/2).set_width(height/2))
    @cage.modify(HEM_ChamferCorners.new.set_distance(height*0.1))
    #HES_Planar() subdivision can include a measure of randomness
    @cage.subdivide(HES_Planar.new.set_random(true).set_range(0.4),2)
 
    #A save choice after introducing any kind of randomness is to triangulate possible concave faces.
    #Concave faces do not invalidate the mesh but can give unexpected results.
    @cage.triangulate_concave_faces()
 
    @cage.modify(HEM_Lattice.new.set_depth(0.016*height).set_width(0.016*height).set_fuse(true))
    sel = HE_Selection.new
    for f in cage.f_itr        # using ruby syntax here
      sel.add f
    end
    cage.subdivide_selected(HES_CatmullClark.new(),sel,2)
  end


  def draw
    background(120)
    lights
    translate(width/2, height/2)
    rotate_y(mouse_x * 1.0  / width * TWO_PI - Math::PI)
    rotate_x(mouse_y * 1.0 / height * TWO_PI - Math::PI)
    fill(255)
    no_stroke
    cage.draw_faces
    stroke(0)  
    cage.draw_edges
  end

  def configure_opengl
    render_mode OPENGL
    hint ENABLE_OPENGL_4X_SMOOTH     # optional
    hint DISABLE_OPENGL_ERROR_REPORT # optional
  end

end


Thursday, 3 March 2011

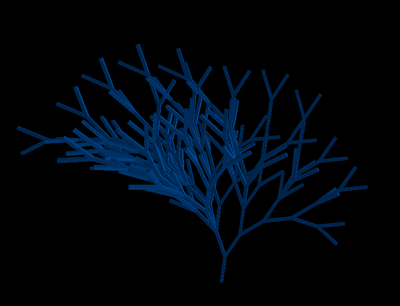
The 'growing' of a context-sensitive L-system plant (ruby-processing)

LSystem rules from a paper by Tong Lin at UMBC Maryland. The following code could be simplified if you could rely on string index being a char (ruby 1.9) rather than ascii value (ruby 1.8), tripped me up at first, ruby-processing is still at 1.8 (it depends on JRuby which will start supporting ruby 1.9 from JRuby version 1.6?)

Update 10 March 2011 just tried jruby-complete-1.6-RC3 still get old behaviour ie ascii value rather than char when indexing a string, nor is ord method supported still requires Jeremys shim to string.


########################################################
# cs_test.rb
# A 3D Plant implemented using a Context Sensitive
# Lindenmayer System in ruby-processing
# by Martin Prout (3 March 2011)
########################################################

class CS_Test < Processing::App
  full_screen # NB: All distances are relative to screen height
  load_libraries 'csplant', 'PeasyCam', 'opengl'
  import 'peasy'
  import "processing.opengl" if library_loaded? "opengl"
  attr_reader :csplant, :cam

  def setup
    library_loaded?(:opengl) ? configure_opengl : render_mode(P3D)
    configure_peasycam
    @csplant = CSPlant.new(height)
    csplant.create_grammar 5
    no_stroke
  end

  def configure_peasycam
    cam = PeasyCam.new self, height / 6.5
    cam.set_minimum_distance height / 10
    cam.set_maximum_distance height
  end

  def configure_opengl
    render_mode OPENGL
    hint ENABLE_OPENGL_4X_SMOOTH     # optional
    hint DISABLE_OPENGL_ERROR_REPORT # optional
  end

  def draw
    background 0
    lights
    csplant.render
  end

end


The PeasyCam and csplant libraries need to be nested in the usual way in a library folder. This code is much more complicated than my previous post. This is mainly due to the need to ignore certain symbols when determining context, and hence need to navigate along the production string.


######################################
# csplant.rb
# A library used to implement
# a context sensitive
# 1-L lsystem grammar in
# ruby-processing
# by Martin Prout (4 March 2011)
######################################

################################################
# A helper class stores cs prefix idx, and cchar
# uses idx and char to determine context and
# pre to access context sensitive rule from rules
###############################################
class CSRule

  attr_accessor :pre

  def initialize pre
    @pre = pre
  end

  def idx
    x = 0
    if (pre[1] == 60)  # NB comparing ascii values until ruby 1.9 support
      x -= 1
    end
    if (pre[1] == 62)  # ">"[0] = 62, "<"[0] = 60
      x += 1
    end
    return x
  end

  def cchar
    return pre[0]
  end

end

##################################
# The grammar class stores lsystem rules
# in rules Hash, and context Hash if applicable
# In production context is checked (and applied)
# using get_rule method
##################################

class CSGrammar
  IGNORE = "[]+-^&3"       # characters to ignore for context as a constant string
  attr_reader :axiom, :context, :rules, :count
  def initialize(axiom)
    @axiom = axiom
    @rules = Hash.new
    @context = Hash.new
  end

  def add_rule(pre, rule)
    if pre.length == 3
      context.store(pre[2], CSRule.new(pre))
    end
    rules.store pre, rule
  end

  def generate(repeat = 0) # repeat iteration grammar rules
    prod = axiom
    repeat.times do
      prod = new_production(prod)
    end
    return prod
  end


  def new_production prod  # single iteration grammar rules
    @count = 0       # initialise count on axiom or new prod
    prod.gsub!(/./) do |ch|
      get_rule(prod, ch)
    end
  end

  def get_rule prod, ch
    rule = ch   # default is to return original character as rule (ie no change)
    idx = count # idx is a local index, used to navigate the production string
    if (context.has_key?(ch[0]))      
      while IGNORE.include?(prod[context[ch[0]].idx + idx].chr)
        idx += context[ch[0]].idx
      end
      if prod[context[ch[0]].idx + idx] == context[ch[0]].cchar
        rule = rules[context[ch[0]].pre]
      else
        rule = rules[ch] if rules.has_key?(ch) # context free rule if it exists
      end      
    else
      rule = rules[ch] if rules.has_key?(ch) # context free rule if it exists
    end
    @count += 1 # increment the index of axiom/production as a side effect
    return rule
  end
end

############
# CSPlant
############
class CSPlant
  include Processing::Proxy

  attr_reader :grammar, :axiom, :production, :premis, :rule,
  :theta, :scale_factor, :distance, :phi, :len

  def initialize(len)
    @axiom = "F"
    @grammar = CSGrammar.new(axiom)
    @production = axiom
    @len = len
    @distance = len/4      # distance value relative to screen height
    @theta = Math::PI/180 * 25
    @phi = Math::PI/180 * 25
    grammar.add_rule("F", "F[-EF[3&A]]E[+F[3^A]]")
    grammar.add_rule("F<E", "F[&F[3+A]][^F[3-A]]")  # context sensitive rule
    no_stroke()
  end

  def render()
    fill(0, 75, 152)
    light_specular(204, 204, 204)
    specular(255, 255, 255)
    shininess(1.0)
    repeat = 1
    production.scan(/./) do |ch|
      case(ch)
      when "F"
        translate(0, distance/-2, 0)
        box(distance/9, distance, distance/9)
        translate(0, distance/-2, 0)
      when "+"
        rotateX(-theta * repeat)
        repeat = 1
      when "-"
        rotateX(theta * repeat)
        repeat = 1
      when "&"
        rotateZ(-phi * repeat)
        repeat = 1
      when "^"
        rotateZ(phi * repeat)
        repeat = 1
      when "3"
        repeat = 3
      when "["
        push_matrix
      when "]"
        pop_matrix
      when "E", "A"
      else
        puts("character '#{ch}' not in grammar")
      end
    end
  end
  ##############################
  # create grammar from axiom and
  # rules (adjust scale)
  ##############################

  def create_grammar(gen)
    @distance *= 0.5**gen
    @production = grammar.generate gen
  end
end


Followers

Blog Archive

About Me

My photo
I have developed JRubyArt and propane new versions of ruby-processing for JRuby-9.1.5.0 and processing-3.2.2